
Key Takeaway
- Disney Plus Error Code 39 occurs due to a rights management issue that prevents Disney from playing the requested video.
- The issue may occur due to geographical restrictions, corrupt cache files, faulty HDMI connection, or poor internet connection.
- Power cycling your device, re-logging into your Disney plus account, or reinstalling the Disney Plus app may resolve the Disney+ Error Code 39.
Sometimes, I wish I wasn’t a technical man so I could just call someone for assistance whenever I had a problem with one of my smart entertainment systems. Imagine getting home from work on a Friday, putting on your smart TV to watch the remaining episodes of Mr. Marvel on Disney Plus, and seeing this message displayed on the screen.
Disney Plus usually functions without a hitch, although it may exhibit issues, occasionally with strange error codes. For instance, you can get the Disney Plus Error Code 39, which is often indicative of a Digital Rights Management issue.
If Disney Plus detects that your device lacks the necessary authorization or a secure connection to play back content protected by digital rights or copyrights, you will see the Disney plus error Code 39.
When I encountered the issue on my smart TV, I quickly ran through the internet to find the possible causes and troubleshoot for the same. It did not take me long to fix the issue following some basic troubleshoots, which I believe my readers must also know. And hence, this article!
Why Does Disney Plus Error Code 39 Occur?
Disney Plus Error Code 39 may appear if the video you want to play is momentarily unavailable. There are many reasons why the issue may exhibit, but the same can be fixed easily.
Here are some of the most prevalent causes of Disney+ Error Code 39.
- Digital Rights Management Issue
- Using Disney Plus on a device that isn’t supported
- Regionally restricted content
- A large number of requests for certain videos
- Poor internet connection
- Poor or interrupted HDMI connection
- Corrupted temporary data or cache files
- Remaining temporary files on the Xbox or PS4 console.
9 Ways to Fix Disney+ Error Code 39
1. Check Your Internet Connection
There are times when you get Disney Plus Error Code 39 owing to something as basic as a bad internet connection. As a result, if someone tells me they’re having trouble using the Disney Plus app on Roku TV, the first thing I tell them is to check their internet speed. Before attempting further solutions, we must rule out the likelihood of a bad internet connection.
Here’s the easiest way to check the speed of your internet connection.
- Step 1: Go to the internet browser on your Roku TV.
- Step 2: Type www.fast.com in the address bar.
- Step 3: The server will take a few seconds and display the WiFi speed on your screen.
If you notice that the internet connection is not robust, restarting your router may help you solve this problem.
Here’s how
- Step 1: Unplug or switch off the router.
- Step 2: Wait for 30 seconds to 1 minute.
- Step 3: Replug or switch on the router.
- Step 4: Check if your WiFi connection is any better.
2. Try Playing Other Content on Disney Plus
Some Disney Plus videos are geographically restricted. As a result, if you notice that the Disney Plus error Code 39 only occurs on specific content, the video may be unavailable in your region.
Hence, you need to play some other content to continue enjoying Disney Plus, but if you still want to watch it, try connecting your device to a VPN and playing the video. You can use a VPN to change your location. As a result, you should be able to access the information.
3. Check The HDMI Cable Of Your Smart TV
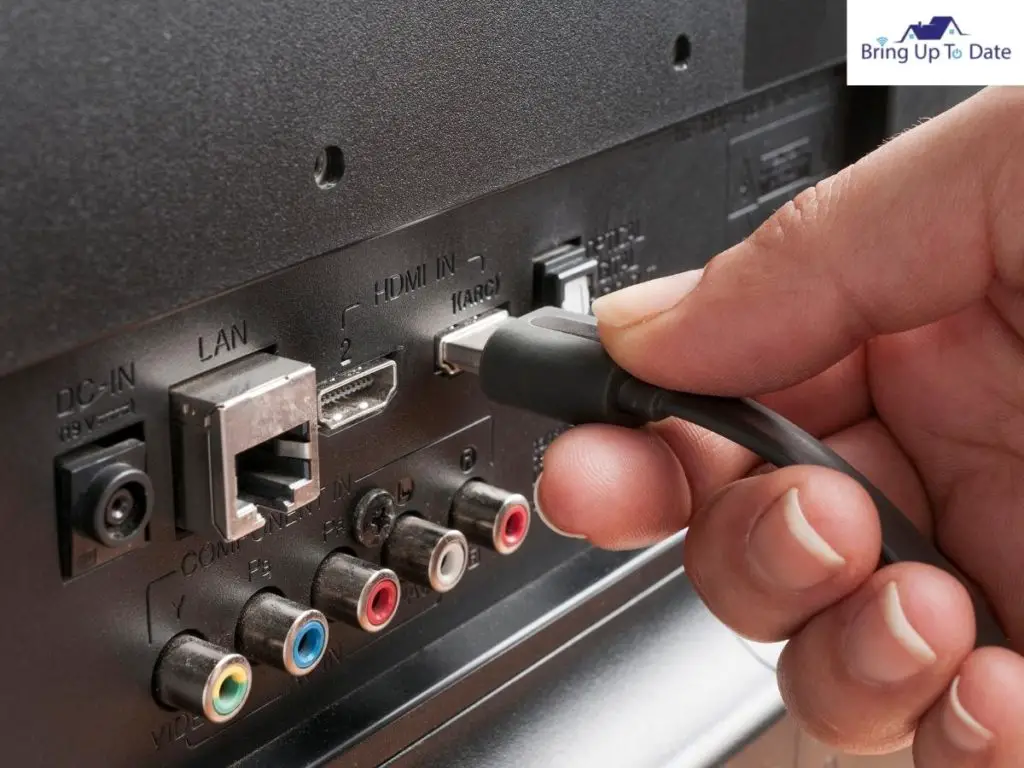
There is a possibility that the HDMI cable that is attached to the TV is either faulty or is not connected well, which is resulting in the error code 39 on Disney Plus. Hence, ensure to check the HDMI port for any dust buildup if there are no obvious physical symptoms of wear and strain.
Here’s how
- Step 1: Turn off your Smart TV
- Step 2: Remove the HDMI cable from its port.
- Step 3: Ensure that the port does not accumulate dust, as dust in ports tends to break the circuit. You can clean the traces of dust in the port using a blow dryer.
- Step 4: Wait for 15 seconds.
- Step 5: Plug the HDMI cable back into the port
This method might help you resolve the issue if the HDMI connection is interrupted. However, if you still have no luck, try replacing the HDMI cable to rule out the possibility of a malfunctioning cable.
4. Launch The Disney Plus App Again

A simple software error, such as a faulty data cache, might occasionally interfere with video playback. This can occur on any device and exhibit an error on the Disney plus app. Hence, I recommend relaunching the app to rule out the possibility of an unresponsive program or faulty data.
Simply force stop or close the Disney Plus app on your smart device and launch the app again.
5. Re-Login To Your Disney Plus Account
If you can’t connect to Disney due to error code 39, it is likely that the Disney Plus account glitch is to blame for the issue; try logging out and back into your Disney Plus account to fix the issue. When logging in, ensure you are entering the correct credentials. Also, note that the passwords on Disney plus are case-sensitive.
Here are the steps to do the same.
- Step 1: Go to the Disney Plus app settings.
- Step 2: Go to the Account option
- Step 3: Logout from the app account
- Step 4: Enter the login credentials again to log in to the account.
Once logged in, check to see if Disney Plus content is now playing as it should. If you still don’t have any luck, please try out the next troubleshooting step.
6. Power Cycle Your Smart Device
Power cycling your TV, tablet, or smartphone may help you fix fundamental issues related to the application. Power cycling your smart device is the same as soft-resetting your device, wherein you simply turn off and on your device to restart it.
Restarting your smart device terminates all running processes and apps and reloads all system files from scratch. Also, it is worth noting that a soft reset does not result in the loss of data on your device.
Below are the steps to power cycle or soft-reset your device
- Step 1: Turn on your smart device.
- Step 2: Hold the power button for about 10 seconds until the device completely turns off. The mechanism to turn off your device may vary.
- Step 3: Wait for about 1 minute.
- Step 4: Turn your device back on.
Once your device turns back on, relaunch the Disney plus app to find out whether it works well now.
7. Clear The Cache On The Disney Plus App
If restarting your device has not been able to fix the issue of Disney+ Error Code 39, clearing the cache should likely fix it for you.
A cache is a temporary file storage space in a smart device that enables a device like a smartphone, laptop, or TV or the installed apps to run faster and more efficiently. The presence of too much cache on a device is, of course, one of the most frequent reasons why it starts performing strangely and can be a possible reason for the Disney Plus Error Code 39.
However, any temporary data that is occupying storage space on the device and causing problems can be removed by clearing the cache. Additionally, in order to avoid problems like these, it’s crucial to regularly clean your system cache.
Clearing Cache On iOS Device
- Step 1: Delete the Disney+ app on your device.
- Step 2: Reinstall it from App Store.
- Step 3: Log in to your Disney Plus account using the correct credentials.
Clearing Cache On Android Device
- Step 1: Go to the settings option on your android device.
- Step 2: Scroll down on the Disney Plus app in the list and tap on it.
- Step 3: Go to storage and select Clear Cache.
- Step 4: Restart your device and log in to your Disney Plus account using the correct credentials.
Clearing Cache On TVs with Built-In Chromecast
- Step 1: Open Settings from the Home Screen of your Chromecast built-in TV.
- Step 2: Go to Apps and select Chromecast built-in.
- Step 3: Select Clear data and press OK to confirm.
- Step 4: Select Clear cache and press OK to confirm.
- Step 5: Restart your TV and log in to your Disney Plus account using the correct credentials.
Clearing Cache On TVs On Fire TV Or Fire TV Stick
- Step 1: Navigate to the Settings menu on your Amazon Fire TV or Fire TV Stick.
- Step 2: Select Manage Installed Applications from the Applications menu.
- Step 3: Select Disney Plus from the list and press the Clear Cache and Clear Data buttons.
- Step 4: Re-enter your Disney Plus account information to log in.
7. Uninstall And Reinstall The Disney Plus App
If a simple restart of your device or clearing the Disney plus cache did not resolve the problem for you, you should attempt reinstalling the Disney+ program to delete any potentially corrupted data that may have contributed to the appearance of Error Code 39. Many affected users confirmed that the process was successful for them and helped them resolve the issue.
It is noteworthy that uninstalling the app will not unsubscribe you from the Disney Plus account. If you wish to do so, read one of my past articles about how to cancel Disney Plus.
The steps for reinstalling the app may differ depending upon the device you are using the Disney Plus app on. In this section of the article, I am covering some of the major devices to help you reinstall the Disney Plus app.
8. Reinstalling Disney Plus App On Apple TV Or Smartphone
- Step 1: Simply highlight the Disney Plus app on your Apple TV’s Home Screen or smartphone app screen.
- Step 2: Then press and hold the Disney Plus logo until the app’s symbol begins to bounce.
- Step 3: When the app logo begins to wobble, click on the Delete option from the list that appears.
- Step 4: After completely uninstalling the app, enter the App Store on your device and look for the Disney Plus app to re-download it.
- Step 5: Upon redownloading the app, log in to your Disney Plus account again by entering your user credentials correctly.
- Step 6: Once the installation process is complete, restart your device and check to see if the issue of Disney+ Error Code 39 has been resolved.
Reinstalling Disney Plus App On Android TV or Smartphone
- Step 1: Press Home Button on your smart TV remote.
- Step 2: Go to the Google Play Store from the app list.
- Step 3: Once inside Google Play Store, search for the Disney+ app and tap on it.
- Step 4: Select Uninstall.
- Step 5: When the process is finished, restart your Android TV and wait for the startup to finish.
- Step 6: Then, from the Home menu, navigate to the Google Play Store again
- Step 7: Once again, search for the Disney+ app, and reinstall it.
Reinstalling Disney Plus App On Roku TV
- Step 1: Go to the Roku TV Home screen.
- Step 2: Select the Settings option.
- Step 3: Select Manage Installed Applications and uninstall the Disney Plus app.
- Step 4: Restart your device.
- Step 5: Go to the Settings option again.
- Step 6: Go to Applications and select Appstore.
- Step 7: Search for the Disney+ app and press the install button.
9. Power Cycle The Console (If Applicable)
This procedure is only recommended if the Disney Plus app on your Xbox One or PS4 displays Error Code 39. It’s possible that the problem is caused by some temporary files that the Disney+ application inadvertently creates. Under certain conditions, these files may cause streaming troubles, such as Error Code 39.
If you are facing the issue, you should be able to resolve the problem by draining your console’s power capacitors and removing any temporary data that may be causing the problem.
Xbox One
- Step 1: Hold down the power button on the front of your X Box console until you notice the front LED flickering intermittently.
- Step 2: When your Xbox One console is completely turned off, unplug the power cord from the wall socket and wait for 30 seconds to ensure the power capacitors are fully discharged.
- Step 3: Restart your console and wait for the boot process to complete.
- Step 4: Launch the Disney+ app once more to check if the problem has been fixed.
PS4
- Step 1: Check that your PS4 console is completely powered on and not in sleep mode.
- Step 2: Hold down the power button on your PS4 console until the device completely shuts down. Release the button when you hear the fan totally shut down.
- Step 3: Once your PS4 console has been completely switched off, physically remove the power cord from the wall outlet.
- Step 4: Wait at least 30 seconds before connecting the power cord back in to ensure that the power capacitors have been entirely drained.
- Step 5: Restart your console and wait for the startup to finish.
- Step 6: Relaunch the Disney+ app to see if the problem has been resolved.
FAQs
Q1. Will I have to make in-app purchases again after reinstalling the Disney Plus app on my device?
Answer – Reinstalling the Disney Plus app on your device will launch the app afresh and delete the cache data. However, the data within your applications is not affected as it is linked to your email. Hence, you will not have to make the in-app purchases again, as the same shall be restored upon logging in to your account.
Q2. I am unable to sign in to my Disney plus account. How can I resolve Disney plus Roku login issues?
Answer – First of all, ensure that you are entering the correct login credentials to access your Disney Plus account. The username and password are case-sensitive on Disney Plus. If the login fails upon entering the correct details, clear the caches of your Disney Plus app and ensure that the app is running on the latest firmware.
Conclusion
If you are facing the Disney Plus Error Code 39 while playing content, the article must have helped resolve the issue. If you continue encountering Error Code 39 on the video even after troubleshooting, I recommend connecting to the Disney Plus customer service as a last resort. You can report the issue on the Disney Plus app or contact them via phone or live chat.
If you found the information given in the article useful, share it with your friends and family. For more assistance on the issue concerning smart home entertainment, write to me in the comment section. I’ll be happy to help!

As an engineering graduate (and a full-time layabout), I am always looking for smart technological innovations to make my life simpler and more automated so that I can be even lazier than usual.
1 thought on “Disney Plus Error Code 39: Here Are 9 Ways To Troubleshoot The Issue!”